4.1. Text-to-Image
Generate highly creative images by entering a few simple prompts.
4.1.1 Interface Introduction
- Prompt: Enter your idea to generate a creative image with one click.
- Generation Size: Used to set the size of the generated image.
- Advanced Settings: More advanced operations to adjust the generation effect.
- Generation Results: Used to display the generated images.

4.1.2 Prompts
- Positive Prompts: Enter the results you want; the richer and more accurate the adjectives, the better the generated results.
Positive prompts are the core of Text-to-Image, using concise word combinations to describe the creativity you want to present. Example: “Anime girl holding a paintbrush and drawing board by the window, drawing in an animator’s studio, beautiful anime portrait, anime realism style, realistic anime art style”.
No need for complex sentences; try to enter short nouns or phrases separated by commas to help the AI better understand your idea.
❗ Currently, prompts only support English recognition. You need to translate manually before entering. We will launch more prompt assistance functions later.
- Negative Prompts: Enter content you don’t want to appear in the image to reduce interference with the generation results.
- Clear: Click the “Clear” button in the lower right corner to clear the currently entered prompt content with one click.
- If no keywords are entered, the AI will randomly generate an image for you.
4.1.3 Generation Size
- You can customize the width and height of the size, with a maximum limit of 1024*1024 pixels.
- If “Follow Selection” is enabled, the generation size will match the selection size, and the generated result can be inserted into the selection with one click.
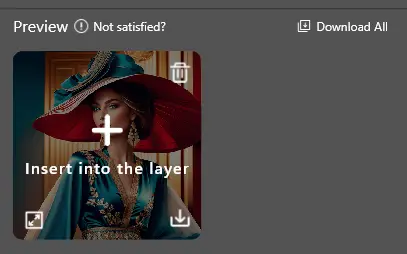
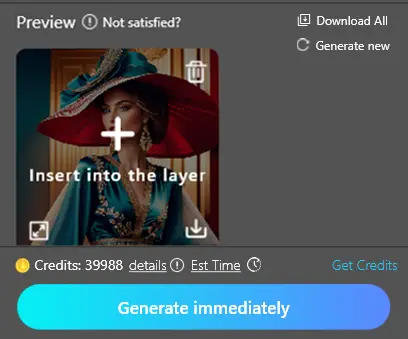
4.1.4 Generation Results
If the selection is an irregular shape, it will be generated as a rectangle for better generation results~
- Insert Layer: Click the image to insert it as a new layer.
- Delete: Click the delete button to delete the image from the records.
- Download: Click the download button to save the image to your local device.
- Generate Another: Generate a new result with the original parameters.
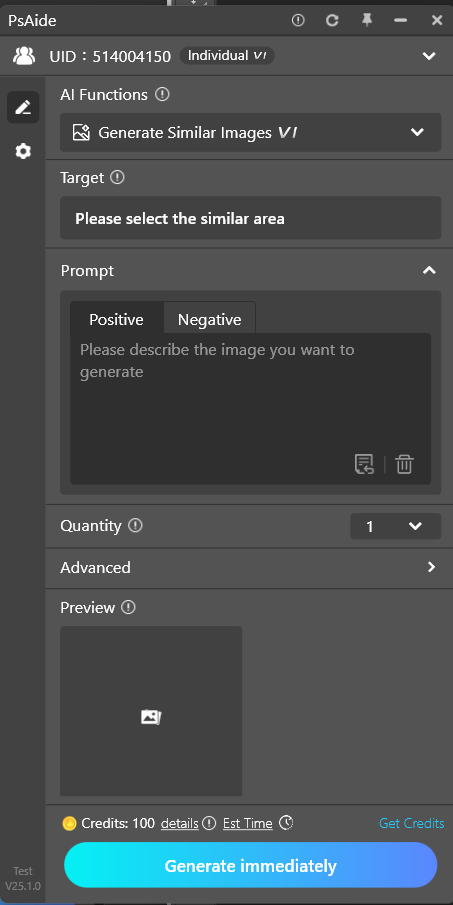
4.2 Generate Similar Image
Generate an image with a certain degree of similarity based on the selected reference area
4.2.1 Interface Introduction
- Target: The area to be used as a reference.
- Prompt: Enter your idea to generate a similar image based on the prompt.
- Generation Size: The size of the target selection, which is also the size of the generated image.
- Advanced Settings: More advanced operations to adjust the generation effect.
- Generation Results: Used to display the generated images.
4.2.2 Target
- The target is the reference area selected on the Photoshop canvas using the selection tool.
4.2.3 Prompts
- Positive Prompts: Enter the results you want; the richer and more accurate the adjectives, the better the generated results.
- Negative Prompts: Enter content you don’t want to appear in the image to reduce interference with the generation results.
- Clear: Click the “Clear” button in the lower right corner to clear the currently entered prompt content with one click.
- If no keywords are entered, the AI will randomly generate a similar image based on the reference area.
❗Currently, prompts only support English recognition. You need to translate manually before entering. We will launch more prompt assistance functions later.
4.2.4 Generation Size
- Displays the size of the target selection, and the generated image will be created in this size.
4.2.5 Gener
If the selection is an irregular shape, it will be generated as a rectangle for better generation results~
- Insert Layer: Click the image to insert it as a new layer.
- Delete: Click the delete button to delete the image from the records.
- Download: Click the download button to save the image to your local device.
- Generate Another: Generate a new result with the original parameters.
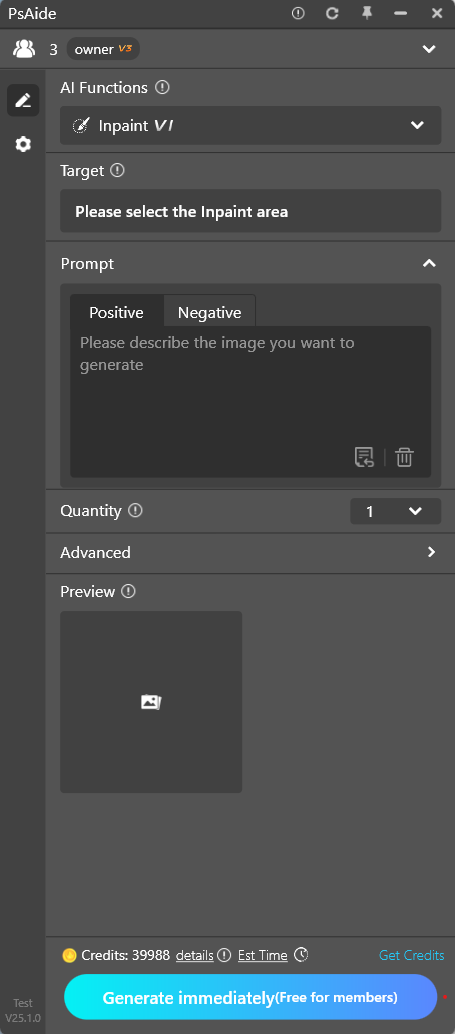
4.3 Local Redrawing
Redraw a specific local area of the image.
4.3.1 Interface Introduction
- Target: The area to be redrawn locally.
- Prompt: Enter your idea to generate locally redrawn content based on the prompt.
- Generation Size: The size of the target selection, which is also the size of the generated image.
- Advanced Settings: More advanced operations to adjust the generation effect.
- Generation Results: Used to display the generated images.
4.3.2 Target
- The target is the area to be redrawn locally, selected on the Photoshop canvas using the selection tool.
4.3.3 Prompts
- Positive Prompts: Enter the results you want; the richer and more accurate the adjectives, the better the generated results.
- Negative Prompts: Enter content you don’t want to appear in the image to reduce interference with the generation results.
- Clear: Click the “Clear” button in the lower right corner to clear the currently entered prompt content with one click.
4.3.4 Generation Size
- Displays the size of the target selection, and the generated image will be created in this size.
4.3.5 Generation Results
For easy viewing, the redrawn results will be displayed as rectangles. Don’t worry—click “Insert Layer” and it will fill according to the selection area~
- Insert Layer: Click the image to insert it as a new layer.
- Delete: Click the delete button to delete the image from the records.
- Download: Click the download button to save the image to your local device.
- Generate Another: Generate a new result with the original parameters.
4.4 Lossless Upscaling
Upscale images clearly without distortion, enrich details, and improve image resolution with one click.
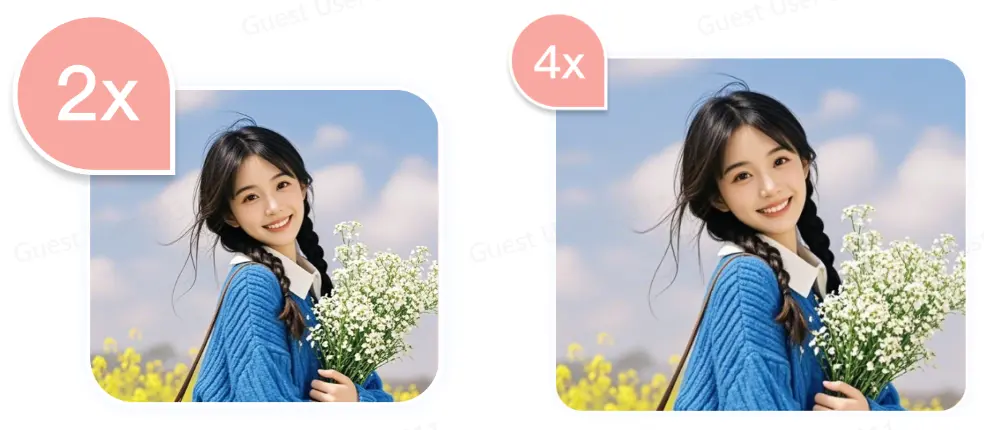
Original Image
Effect Image
4.4.1 Interface Introduction
- Target: The area to be losslessly upscaled.
- Magnification: Select the magnification you want.
- Generation Results: Used to display the generated images.
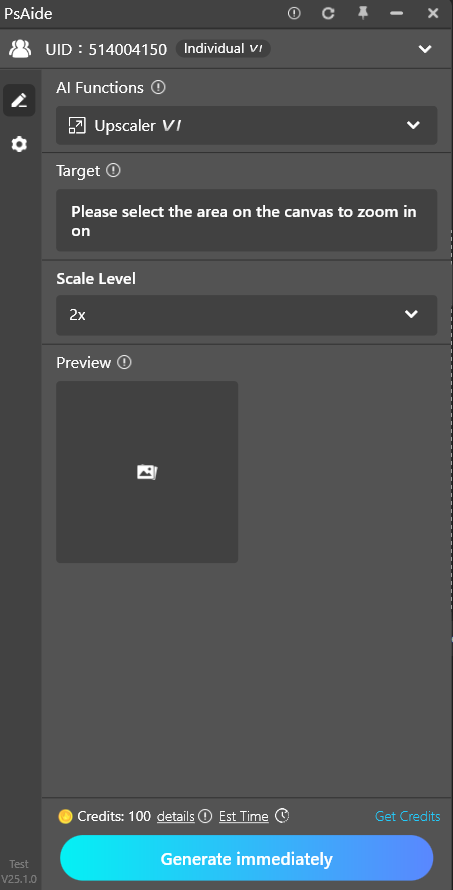
4.4.2 Target
- The target is the area to be losslessly upscaled, selected on the Photoshop canvas using the selection tool.
4.4.3 Magnification
- Provides 2x and 4x magnifications to adjust the upscale ratio.
4.4.4 Generation Results
~If the selection is an irregular shape, it will be generated as a rectangle for better generation results~
- Insert Layer: Click the image to insert it as a new layer.
- Delete: Click the delete button to delete the image from the records.
- Download: Click the download button to save the image to your local device.
- Generate Another: Generate a new result with the original parameters.
What is SwinR_4x?
SwinIR_4x is an image super-resolution reconstruction algorithm based on Swin Transformer, which can upscale low-resolution images by 4 times to generate high-resolution images. Swin Transformer is a new type of Transformer model that offers better parallelism and higher computational efficiency when processing 2D data such as images compared to traditional Transformer models. SwinIR_4x improves the quality and speed of image reconstruction by introducing Swin Transformer and Local Adaptive Module (LAM). The Local Adaptive Module enhances local details of the image, thereby improving realism and clarity. SwinIR_4x is widely used in computer vision, especially in image reconstruction, image enhancement, and image super-resolution.
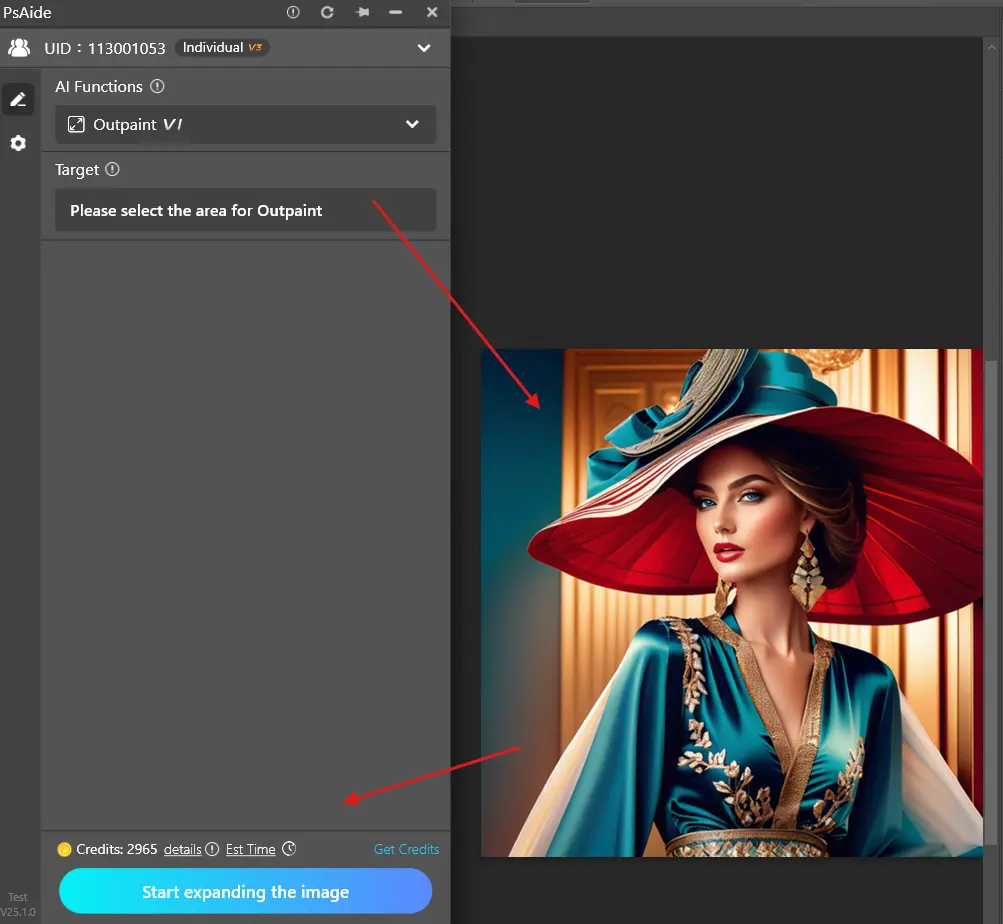
4.5 Image Expansion
Recognize image content, expand the image with one click, and intelligently generate more content for your image.
- It is recommended to select more than three sides of the area for expansion for better stability.Interface Introduction
4.5.1 Interface Introduction
- Target: The original image for expansion.
- Prompt: Enter your idea to generate an image based on the prompt.
- Expansion Records: Used to display generated images.
4.5.2 Target
- The image displayed on the page is the target area, which is the area to be expanded selected on the Photoshop canvas using the selection tool.
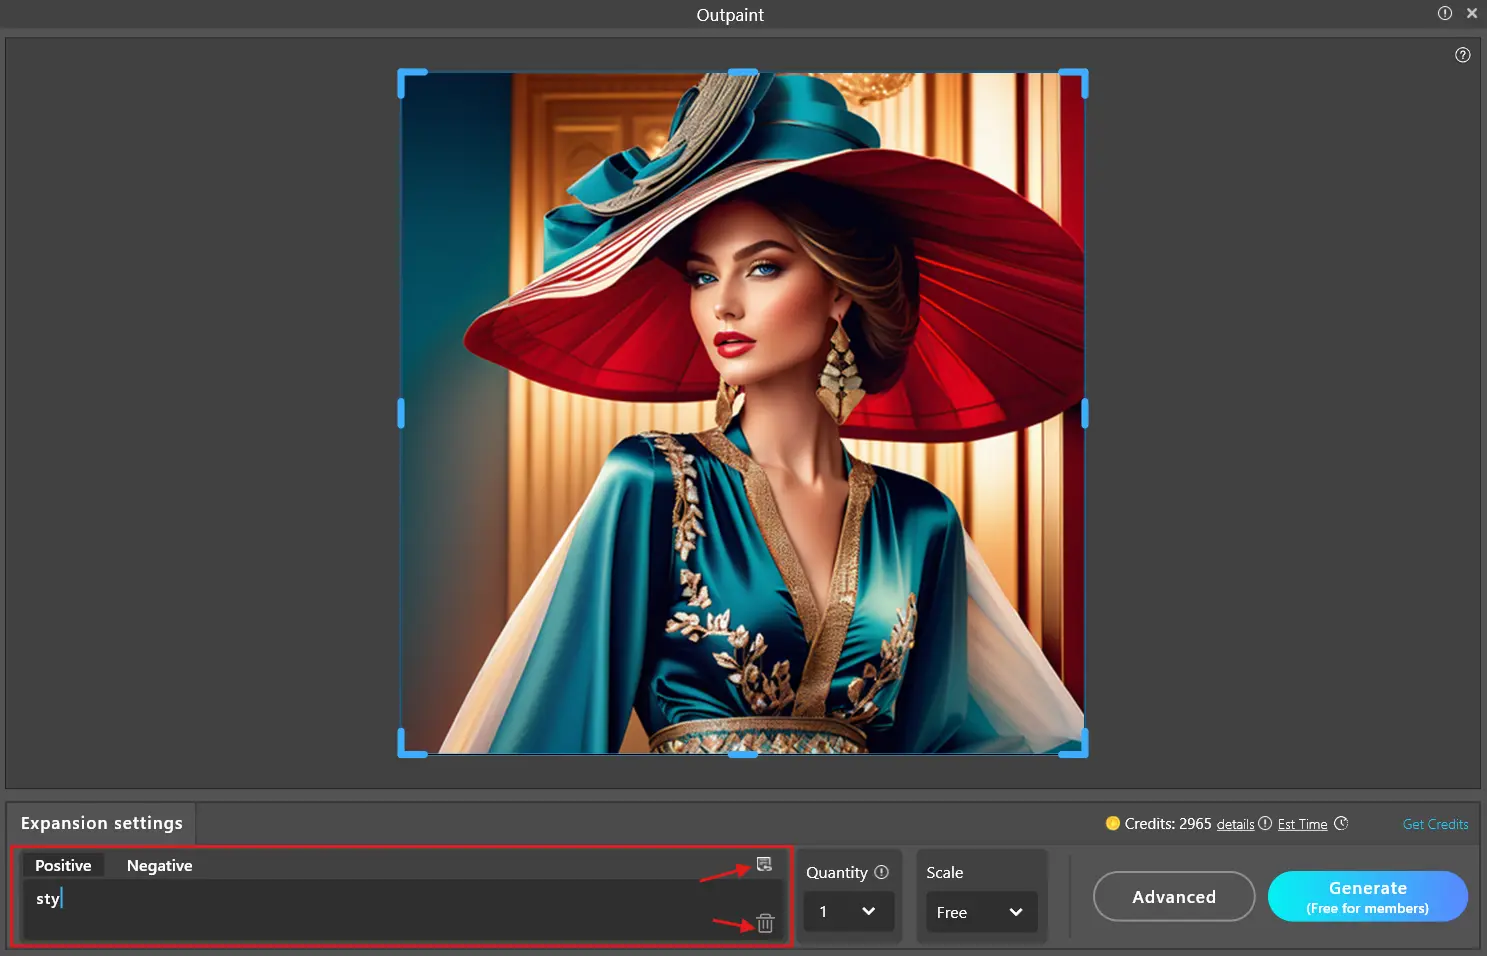
4.5.3 Prompts
The more relevant the Prompt is to the content of the original image, the better the generation effect will be.
- Positive Prompts: Enter the results you want; the richer and more accurate the adjectives, the better the generated results.
Negative Prompts: Enter content you don’t want to appear in the image to reduce interference with thegeneration results. - Delete: Click the “Delete” button in the lower right corner to clear the current content with one click.
- Prompt Generator: Click the “More” icon in the upper right corner to use the prompt generator to help add prompts.
4.5.4 Expansion Records
- Regenerate: Keep the current parameters and perform the expansion operation again.
- Expansion Records: Display the latest 50 historical records.
- Delete Records: When the mouse hovers over a record, click the trash can to delete it.
- Download: Click the button to download the currently viewed expansion result.
- Insert Layer: Click to insert into Photoshop with one click.
4.6 HD repair
Repair blurry pictures with one click to save the picture quality.
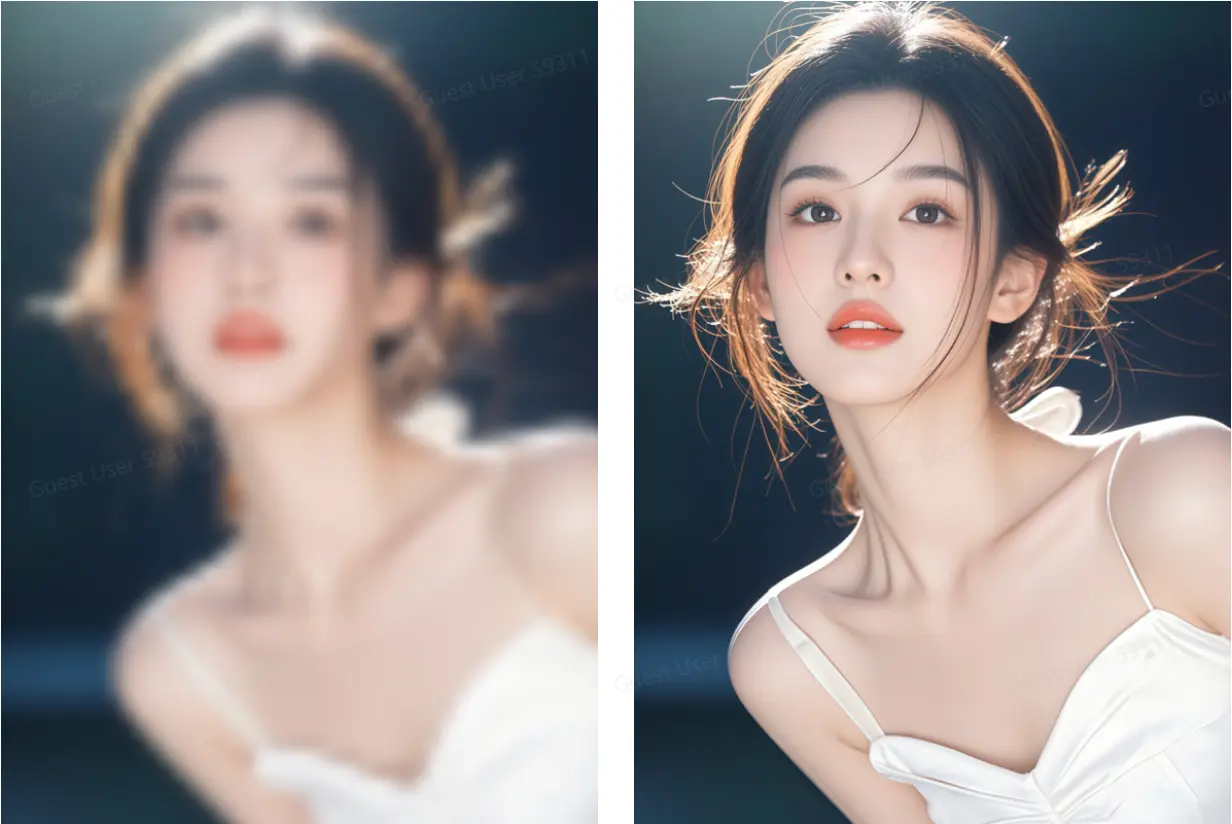
Original image
Effect picture
4.6.1 Interface introduction
•Objective: Areas that need to be repaired in image quality.
• Generate results: Used to display the generated image.
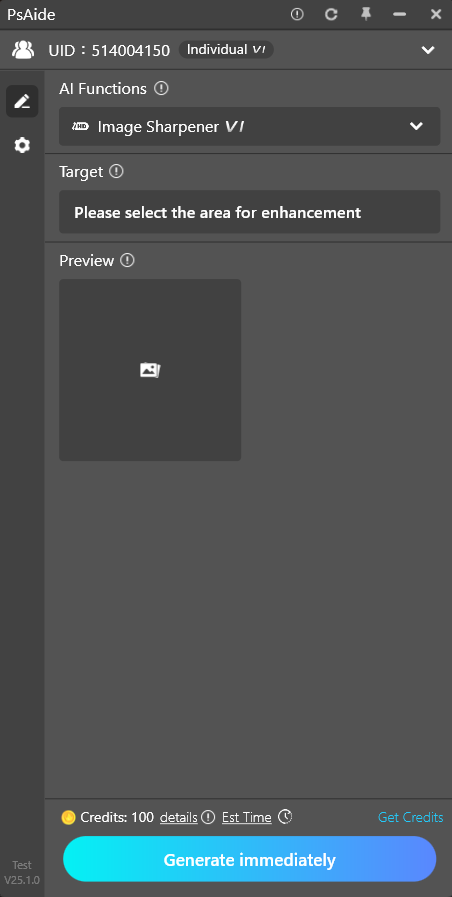
4.6.2 Target
•The goal is to select areas that require HD repair through the selection tool on the PS canvas.
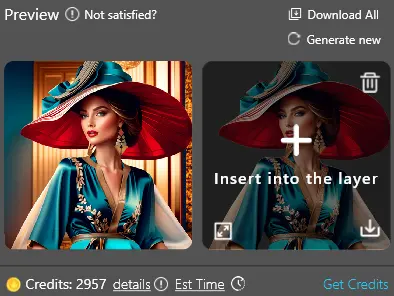
4.6.3 Generate res
tion is irregular, the result will be generated in a rectangle for better generation~
- Insert layer: Click on the image and it will be inserted as a new layer.
- Delete: Click the Delete button to delete the pictures in the record.
- Download: Click the download button to support saving the image locally.
- Let’s take another picture:generate a new result with the original parameters.
4.7 Background removal
One-click intelligent cutout to quickly remove image background.
4.7.1 Interface introduction
•Target::The layer that needs to be removed from the background.
• Generate results::Used to display the generated image.
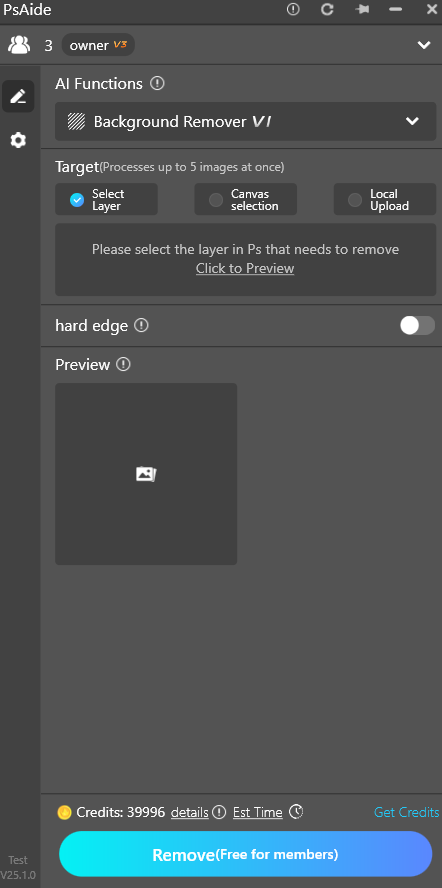
4.7.2 Target
- The goal is to select the layer in the PS where the image that needs to be removed from the background is located.
4.7.3 Generate result
If the selection is irregular, the result will be generated in a rectangle for better generation~
- Insert layer: Click on the image and the selected layer will be inserted in the form of creating a mask.
- Delete:Click the Delete button to delete the pictures in the record.
- Download:Click the download button to support saving the image locally.
- Generate again: generate new results with the original parameters.